Becoming Prepared>Food and Water Storage>How to Butcher and Preserve a Turkey

How to Butcher and Preserve a Turkey

Aug 19, 2024 | by N Johansson


butchering a turkey


How to Butcher and Preserve a Turkey: A Comprehensive Guide for Survivalists

Butchering and preserving your own turkey at home is a valuable skill that not only saves money but also ensures that the meat you serve your family is fresh and free from unnecessary additives. Whether you’re preparing for a self-sufficient lifestyle or just want to take control of your food sources, learning how to butcher and preserve a turkey is an essential skill. In this guide, we'll walk you through the entire process, from preparing your workspace to safely storing the meat for long-term use, with step-by-step instructions.

Preparation Before Butchering

Tools Needed

Before you begin, make sure you have the following tools on hand:

  • Sharp Butchering Knife: A sharp knife is crucial for clean cuts and minimizing waste.
  • Kitchen Shears: Useful for cutting through bones and tough joints.
  • Sturdy Cutting Board: A large, stable surface is essential for safely handling the turkey.
  • Bleach Cleaner: For sanitizing your workspace before and after butchering.
  • Disposable Gloves: These help maintain hygiene throughout the process.
  • Pressure Canner: For preserving the meat after butchering.
  • Canning Jars, Lids, and Bands: Essential for storing the meat long-term.

Setting Up Your Workspace

A well-organized workspace makes the butchering process smoother and safer. Start by cleaning your area thoroughly with a bleach cleaner to kill any bacteria. Lay out your tools within easy reach, and have a waste bin or bag ready for discarded parts. If possible, work in a cool area to keep the meat fresh and reduce the risk of bacterial growth.

butchering & preserving a turkey

Step-by-Step Guide to Butchering a Turkey

Removing the Neck and Giblets

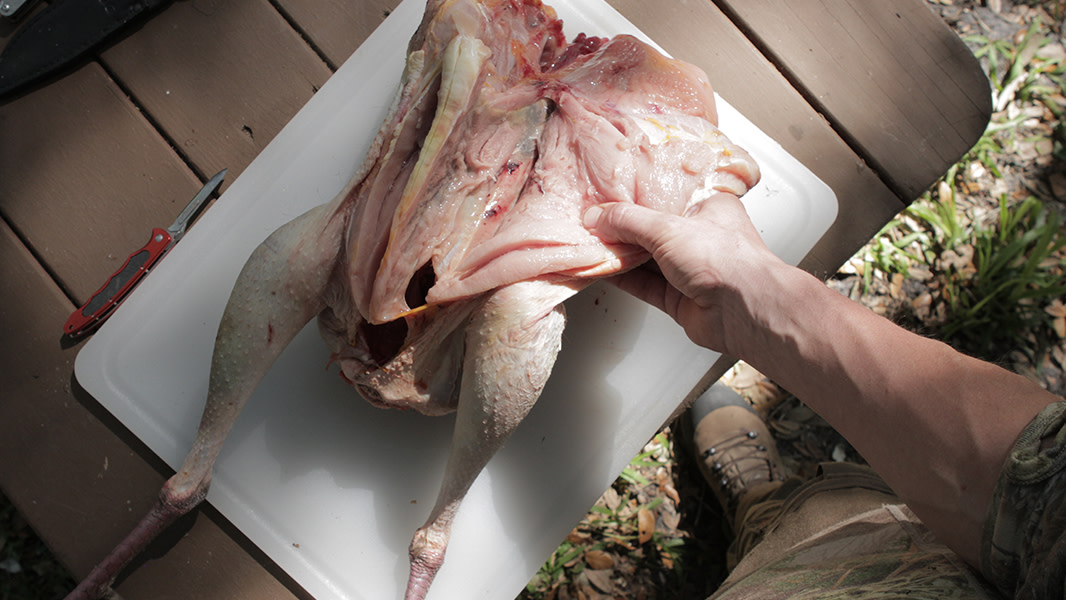
Begin by placing the turkey breast-side up on your cutting board. Reach into the body cavity and pull out the neck and giblets. These can be set aside for making stock or gravy. Be sure to check both cavities (front and back) to ensure all parts are removed.

Removing the Wings

Next, lay the turkey on its back and stretch out one wing. Use your knife to slice through the skin where the wing meets the body. Feel for the joint with your knife and cut through it cleanly. Gravity can help you here—let the wing hang off the edge of the cutting board as you work. Repeat the process on the other wing.

Detaching the Legs and Thighs

With the turkey still on its back, grasp one leg and pull it away from the body. Slice through the skin between the leg and the breast, exposing the joint. Cut through the joint where the thigh bone meets the backbone, using your knife to separate the leg and thigh in one piece. Repeat on the other side.

Butchering the Turkey Breast

For the breast, you have a couple of options:

  • Removing the Backbone: If you want a whole turkey breast, place the bird breast-side down and use your shears to cut along both sides of the backbone, removing it entirely. Then, flip the turkey over and press down firmly to flatten it, a technique known as spatchcocking.
  • Halving the Breast: If you prefer smaller portions, slice down the middle of the breastbone to divide the breast into two halves. This method is useful if you plan to roast or grill the breast separately.

Tips for Efficient Butchering

Handling Large Birds

Turkeys can be heavy and unwieldy. If you’re working with a particularly large bird, consider using a bigger kill cone to manage its size more easily. Alternatively, ask a partner to assist with holding the bird steady while you make cuts.

Maximizing Meat Quality

To ensure the meat remains tender and juicy, avoid cutting too far ahead of cooking time. If you’re not cooking immediately, break down the bird into smaller parts and refrigerate or freeze them promptly. Smaller cuts cook more evenly and are less likely to dry out.

Pressure Canning Turkey for Long-Term Storage

Once your turkey is butchered, preserving the meat through pressure canning is an excellent way to ensure you have ready-to-use turkey for months to come. Here's how to do it:

Ingredients:

  • Fresh turkey (whole or parts)
  • Salt (optional)
  • Turkey broth or water

Equipment:

  • Pressure canner
  • Canning jars (pint or quart-sized)
  • Lids and bands
  • Jar lifter
  • Ladle
  • Large pot
  • Canning funnel
  • Cutting board
  • Sharp knife
  • Clean towels

Instructions:

1. Preparing the Turkey:

  • Butchering: Use the techniques described above to butcher the turkey into manageable pieces.
  • Deboning (optional): Deboning the meat allows you to pack more into each jar and makes it easier to use later.

2. Preparing the Jars:

  • Sterilizing: Wash the jars, lids, and bands in hot soapy water. Rinse well, then sterilize the jars by boiling them in a large pot of water for 10 minutes. Keep them hot until ready to use.
  • Lids and Bands: Place the lids in simmering water (not boiling) to soften the sealing compound.

3. Cooking the Turkey:

  • Lightly Cook (Optional): You can lightly brown the turkey pieces in a pan before canning to develop flavor.
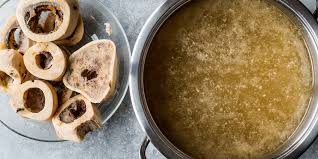
  • Preparing Broth (Optional): Make a simple turkey broth by simmering turkey bones in water for several hours. Strain the broth and keep it hot.

4. Packing the Jars:

  • Raw Pack: Pack the turkey pieces into the jars tightly, leaving about 1 inch of headspace. Add 1/2 teaspoon of salt per pint jar or 1 teaspoon per quart jar for flavor, if desired.
  • Hot Pack: Alternatively, place the hot turkey into the jars and cover with hot broth or water, leaving 1 inch of headspace.

5. Sealing the Jars:

  • Wipe the rims of the jars with a clean, damp cloth to ensure a good seal. Place the lids on the jars and screw on the bands until finger-tight.

6. Pressure Canning:

  • Loading the Canner: Place the filled jars in the pressure canner on the rack. Add the recommended amount of water according to your canner’s instructions.
  • Processing: Secure the lid of the pressure canner. Vent steam for 10 minutes, then place the weight or dial gauge on the vent. Bring the canner to 10 pounds of pressure (adjust for altitude if necessary).
  • Processing Time: Process pint jars for 75 minutes and quart jars for 90 minutes. Maintain the pressure throughout the processing time.

7. Cooling and Storing:

  • Cooling: After the processing time is complete, let the canner cool down naturally. Once the pressure has dropped to zero, remove the lid carefully.
  • Removing Jars: Use a jar lifter to remove the jars and place them on a towel-lined surface. Allow the jars to cool undisturbed for 12-24 hours.
  • Checking Seals: Check the seals by pressing the center of the lids. If the lid does not flex up and down, it is sealed properly.

8. Storing:

  • Label the jars with the date of canning and store them in a cool, dark place. Properly canned turkey can last for 1-2 years or more if stored in optimal conditions.

Using Canned Turkey:

Canned turkey is incredibly versatile. You can use it in soups, stews, casseroles, or as a quick protein addition to salads or sandwiches. Just open a jar, drain the liquid if needed, and add the meat to your recipe.

Safety Note: Always ensure that your pressure canner is functioning correctly and follow the manufacturer's guidelines. Proper pressure canning is essential to prevent the risk of foodborne illness.

Safety and Hygiene Considerations

Maintaining hygiene is critical during the butchering and canning process. Always wash your hands thoroughly before and after handling raw meat, and use disposable gloves if possible. Clean your cutting board and tools with hot, soapy water followed by a bleach solution to prevent cross-contamination. Store the turkey meat in airtight containers or vacuum-sealed bags in the refrigerator or freezer to keep it fresh until ready to can.

Conclusion

Butchering and preserving a turkey at home is a rewarding skill that enhances your self-sufficiency and culinary capabilities. Not only does it allow you to save money, but it also gives you the freedom to customize your cuts for a variety of recipes and ensures that you have nutritious, ready-to-use turkey meat on hand for months to come. With this guide, you're well on your way to mastering the art of turkey butchering and preservation, leading to fresher, more flavorful meals and a more sustainable lifestyle.