Bug Out Bag Checklist
The concept of a bug out bag is rooted in the principles of survivalism and emergency preparedness.
Jul 22, 2024 | by N Johansson

Regular gun maintenance is more than just a good practice—it's essential. Failing to clean your firearm can lead to issues like reduced accuracy, increased likelihood of malfunction, and even safety hazards. A well-maintained gun performs better and lasts longer. Regular cleaning prevents corrosion, removes fouling that can impact accuracy, and ensures that all parts function smoothly. Essentially, keeping your firearm clean enhances your shooting experience and significantly reduces the risk of accidents.
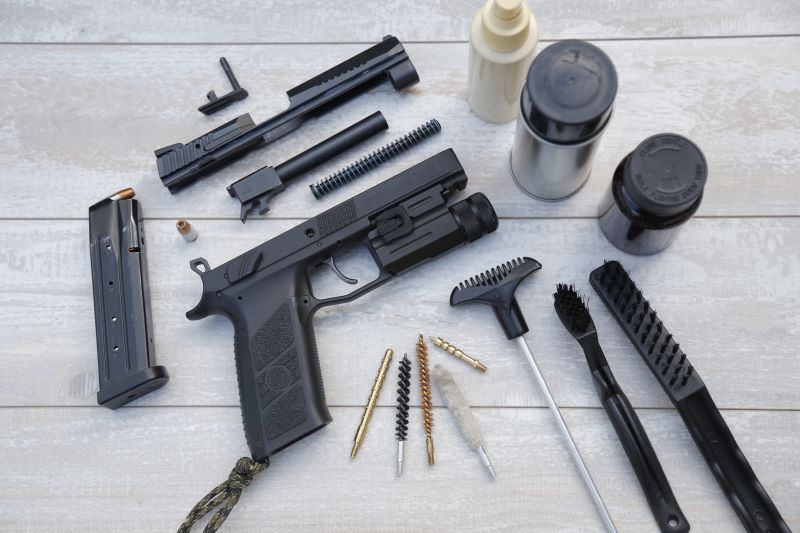
So, what do you need in a gun cleaning kit? Here are the essentials:
Cleaning Rod: This tool is used for pushing patches and brushes through the bore of the firearm. Available in materials like aluminum, brass, and coated steel, it’s crucial to choose a rod that matches or exceeds your firearm’s barrel length to avoid damaging the barrel.
Bore Brushes: Essential for scrubbing the bore's interior, bore brushes come in materials such as brass or nylon. It's vital to use brushes that match the size of your firearm’s caliber.
Cleaning Patches: These small cloth squares are used with the cleaning rod to apply solvent and oil inside the bore. Opt for lint-free patches to avoid leaving fibers behind.
Patch Holder/Jag: This tool attaches to the cleaning rod and holds the cleaning patch securely while you clean the bore.
Cleaning Solvent: Solvents break down carbon, lead, and powder fouling from the barrel and other parts of the firearm. Ensure you choose a solvent that's compatible with your specific firearm.
Gun Oil/Lubricant: Applying gun oil after cleaning keeps moving parts lubricated and prevents rust.
Cloth/Rags: Use these for wiping down metal surfaces. Lint-free cloths are ideal to prevent fibers from being left behind.
Toothbrush/Utility Brush: These brushes are excellent for cleaning intricate parts and areas that patches can’t reach.
While the core components are essential, these additional tools can make the cleaning process even easier:
Bore Snake: A handy tool for quick cleanups, the bore snake combines a bore brush and a patch in one pull-through device.
Cotton Swabs: These are great for reaching tight spots and corners that larger brushes can’t clean.
Punch Set: Though not required for every cleaning, a punch set is useful for disassembling some firearm components.
Mat: Protects your workspace and provides a clean surface to lay out parts and tools during cleaning.
Case/Organizer: Keeps all your cleaning tools and supplies neatly organized and easily accessible.
Not all firearms need the same maintenance. Here’s how to ensure your cleaning kit is tailored to your specific needs:

The concept of a bug out bag is rooted in the principles of survivalism and emergency preparedness.
Bore Cleaning:
Part Cleaning:
Lubrication:
Responsible firearm ownership includes diligent maintenance. With the right cleaning supplies and a consistent routine, you can ensure your gun remains safe, reliable, and ready for use. Remember, cleaning your firearm is more than maintenance—it’s a crucial aspect of safety. Embrace the process and happy cleaning!